Step 1
Open the UVMApper program by Stephen L. Cox
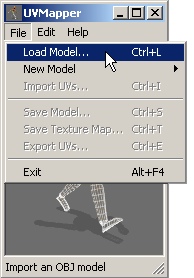
This is the UVMapper window look:

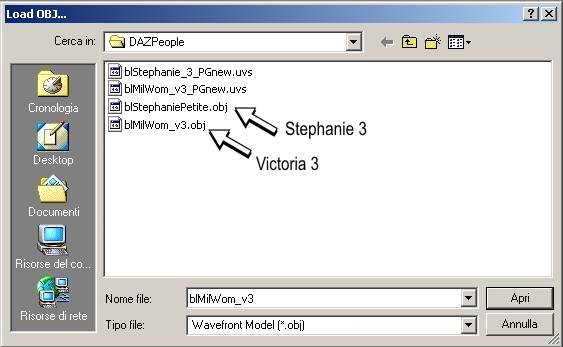
Load the mesh object Victoria V3 geometrie or Stephanie 3 Petite
Select the Menu "File" -> option: "Load Model"

../Runtime/Geometries/DAZPeople/blMilWom_v3.obj
In the same folder you find the Stephanie 3 geometries
../Runtime/Geometries/DAZPeople/blStephaniePetite.obj

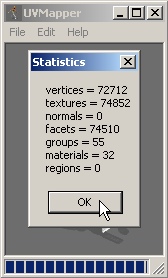
After the model loading, the Uvmapper shows the object statistics...Press the button "OK"
Then the UVMapper window will have this look
Don't touch nothing, leave all thus.


Step 2
Now you must import the UVS file.
Select the Menu "File" -> option: "ImportUVs..."

If you have correctly installed the product,
The "blStephanie_3_PGnew.uvs" file is in this folder:
../Geometries/DAZPeople/blStephanie_3_PGnew.uvs
The "blMilWom_v3_PGnew.uvs" file is in this folder:
../Geometries/DAZPeople/blMilWom_v3_PGnew.uvs

After you have loaded the UVs file , it looks as if nothing has changed, but this is not true, because now the Victoria_v3 mesh object has a new UVmap!

Step 3
Now you must save this new geometry
IMPORTANT! - Remember giving a different name to the new object, otherwise you overwrite the original Victoria_v3.obj geometries.
Select Menu "File" -> option: "Save Model..."

UVMapper opens a new window:
Don't touch nothing,leave all the options unchanged.
Press the button "OK" and save the file.

Select this path: "../Runtime/Geometries/DAZPeople"
Save the New Stephanie 3 file with this name: "blStephanie_3_PGNew.obj"
Save the New Stephanie 3 file with this name: "blMilWom_v3_PGnew.obj"
(Please, respect the path and the names from me suggested)
Well, The new geometrie file is ready!

Step 4
The hard job is ended!
Now they are necessary only two mouse clicks!
In fact, I have included in this new Magic Perfect G! version two small exe programs that provide to create a new Cr2 file for the new remapped geometries.
You find the two exe files in this path:
..\Runtime\MPG_BUILDER\
SP-MPG_Builder.exe provide to create a new Stephanie 3 Cr2 file
V3-MPG_Builder.exe provide to create a new Victoria 3 Cr2 file
![]()
Do a double click on the folder where is installed your Poser Progam
Then Click on the button "Confirm Poser Folder Location"
After few seconds, the program inform you that a new Cr2 file has been created:
"Victoria 3 MPG.cr2" or "Stephanie 3 MPG.cr2"
Press the button "Exit" an close the program.

You find two new icon libraries
You only have now to apply the New Magic Perfect G! Morph targets, and texture, but this is indeed an easy job.


Go to the troublesshoting page